Thursday, 30 April 2015


Hobby Art  " Wings Challenge "


Products used in the making of this card

Hobby Arts Floral Bird House set
Versafine Onyx Ink Pad
Brusho's
Distress Inks 
Watercolour Card


Firstly I sprinkled a mix of brusho's onto the watercolour card and misted with water. Leave to dry or blot with tissue and dry off with heat gun.

Stamp Birdhouse and butterflies and using just a dot of inks ( I used Mermaid Lagoon, Abandoned Coral and Fossilized Amber ) and water mix colours to the shade you like and paint as normal. 

I then decided I would like a border so used the small individual stamp from the set and stamped randomly round the edge and off the edge to form the border. 

Matt and Layer in the usual way. 

Thank you for Looking 

Love Doreen 

Sunday, 26 April 2015

2 Chocolate Baroque Cards

2 Chocolate Baroque Cards


Both cards were made using Distress ink pads although the 2nd it a lot brighter it is purely the amount of ink applied as the same inks were used in both pieces.

I was entering these into the Chocolate Baroque Challenge but have had difficulty accessing it. Maybe I will try on another occasion. 

Thank you for looking 

Love Doreen 

Friday, 24 April 2015

Clarity Challenge #26

The Wee Folk


Using The Wee Folk Elves and Fairies,
I stamped onto shrink plastic and cut out close to the stamped image then using a heat gun carefully shrank them in turn, 

Using theuva card I stamped and embossed the treehouse, masked it off to colour and make a scene.

I coloured the treehouse with wink of stella brush pens, stuck all the shrink plastic onto the house and around the toadstools. To add a little extra texture I used some shrink plastic and stickles. 

To finish I stamped and embossed the sentiment. 

Thank you for looking


Friday, 10 April 2015

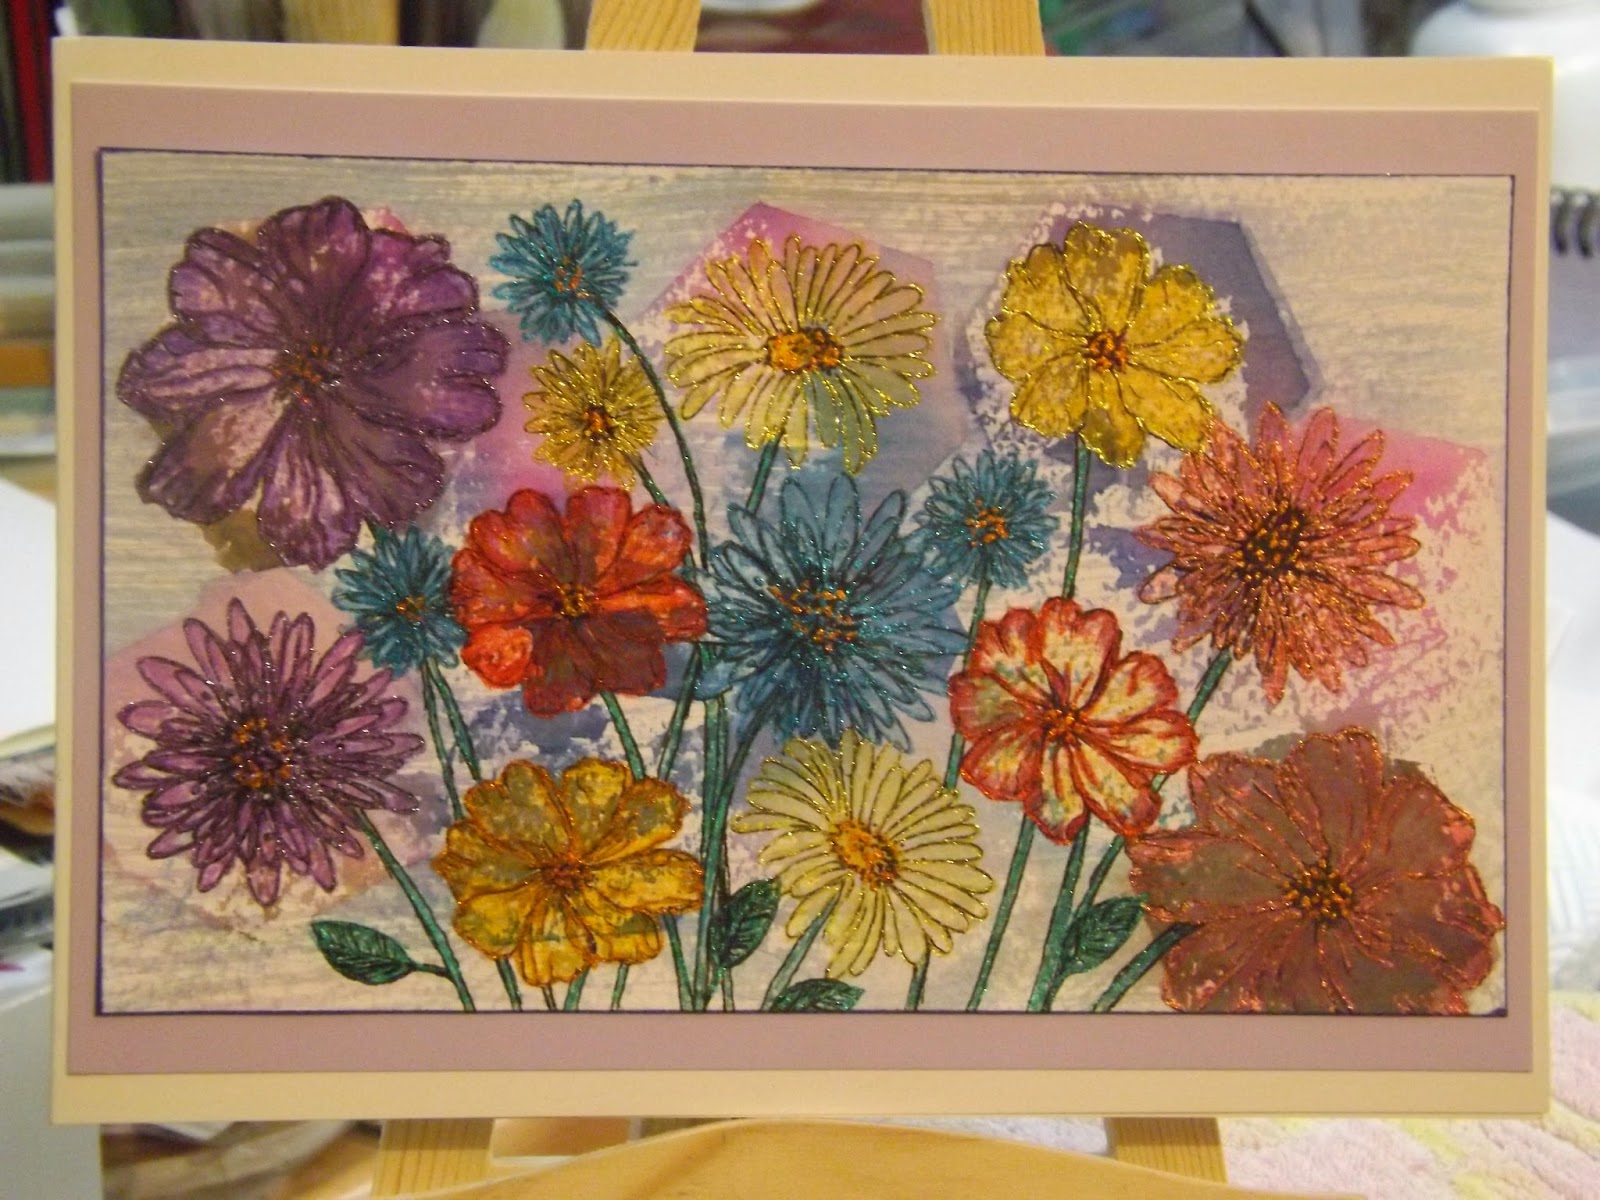
Crafty Individuals Stamp meets 
Bleeding Art Tissues 


Products used to make this card include : 

CI - 385 Crafty Individuals Stamp
Versafine Onyx Black Ink Pad
Wink Of Stella Brushes White and Clear
Uni - Ball Signo Sparkling pens
Tim Holtz idea- ology sentiments
Purple backing card
Nuvo Crystal Drops Raspberry Pink 
Bleeding Art Tissue 
Square 5 x 5 Card
Stamping Card 
Black Micron Pen .005


First things first ... cut your bleeding tissue to the shape and size of your choice I chose 2" hexagons. 
I misted the card first and then laid the colours of choice randomly on the card it was a lot larger than the finished size as that way you can pick an area you are happy with as this is not a guaranteed solid finish, which personally I like as it adds texture. Wet the tissue again once in place either with a mister or brush and water. Leave to dry.

Once dry lift tissues, either keep these for another project ( they will not be as bright and may be tainted where other colours have bled into them ) or put straight in the bin, do not leave them anywhere that they can stain something else as they really do colour most things. 

Take the Versafine Onyx and ink up the stamp and place this in the area of your choice. Let dry or help it along with a heat gun. 

Take the sparkling signo pens and enhance the ink lines with the colours of choice. Then colour the flowers using the Wink of Stella brush pens. 

Next ' frame ' your stamped image with the micron pen using squiggly lines, go round twice.

Cut and mount backing card and stamped topper onto the card blank. 

To finish I took some of the Tim Holtz  sentiment stickers coloured them with distress inks from my stash but anything will do. Then I added the Nuvo Crystal Drops as the final finishing touch. 

Thank you for looking 

Love Doreen 


Monday, 30 March 2015

Hobby Arts March Blog Challenge

Scenes 


This card has a real mix of mediums, I have used :

Hobby Art Spring Scenes CS091D
Hobby Art Butterflies CS077D
Bleeding Artist Tissue
Spectrum Noir Aqua Pens
Pearlescent Pan Pastels 
Gold embossing powder
Hexagon Die
Onyx Versafine ink pad


The Bleeding tissue are applied to the card first and this is not laid down in any particular way but I knew I would need plenty of green so that is why there is so much of it. then I stamped on another piece of card and marked up where I wanted to cut the Hexagon shape, cut roughly around the shape of the primula's and taped the hexagon in place after making sure the primula's were under the die cut as I didn't want to cut them in half ..... I learnt to do this with Anna at my first Hobby Arts workshop in January .... thank you Anna.
I then stamped the daffodils and grass in place and then cut the card with the aperture down to size. Stamped onto the now dry Art tissue background and started colouring the stamped images with the Aqua pens. 

When this had dried I stamped the butterflies in place with a versamark pad and sprinkled with the gold embossing powder then heat set.
I used a gold Sakura pen touch ( large bullet tip) pen to go around all the raw edges of the aperture the topper and the blank card as well. 

Thank you for looking 

Love Doreen 

Sunday, 15 March 2015

Clarity Challenge 25

Anything but a Card ....


Products used in the making of this Canvas include :

Clarity stamps :
Wee folk sets 3 and 4
Clarity stencil from the stencil design club 
Brushos
Spray Starch
Cling Film
Micron Pen 
Jet Black Archival Inkpad
6 x 6  Primed Canvas Board
Gold Sparkling Signo Pen

Take the canvas board,brushos,spray starch and cut a piece of cling film large enough to cover the board.

Take the canvas board and sprinkle brushos of various colours onto the board.
Then spray with the spray starch, do not overdo this step as otherwise it will just all end up a runny mess .... to coin Barbara Grays phrase ... how does she know this ?? lol   Then cover with the cling film and manipulate with your fingers, put to one side and leave to dry.

When dry take the stencil and micron pen, position this however you choose and tape in place. Draw the lines onto the canvas. Remove stencil.

Stamp the elves, fairies, stars and flowers from the Wee Folk sets randomly onto canvas. I chose to do some Zentangle into some of the spaces but this is completely optional.

I then used the gold pen to enhance some areas.

Thanks for looking 

Love Doreen


Sunday, 8 March 2015

Hobby Art Challenge
Flowers for Friends


Products used

Bleeding Art Tissue
CS017D Floral Sketches (Hobby Art Stamps)
CS013D Floral Greeting (Hobby Art Stamps)
Primary selection of Spectrum Noir Pencils
Metallic Gel Pens 
Black Micron Pen 
Versafine Black Ink Pad
Watercolour Card 
Complimentary coloured card


I used a compass and ruler to make a template to cut some hexagon shapes in the tissue, wet the card and applied the tissue and then misted again with water. Leave to dry.

When dry, lift the tissue, and I found I had a puddle of coloured water under the card so using a fan shaped brush mopped it up and dragged the colour across the white areas left on the card.

I then stamped using a variety of the flower heads and then took the micron pen to draw in the stems of the flowers as if they were in a wide necked vase.

I then coloured the flower heads and stems using the pencils. Then to lift the flowers used gel pens to enhance them using the stamped lines as a guide. 

Lastly cut the card to the size you require and mat and layer using the piece of corresponding coloured card. 

Thank you for looking 

love Doreen


Monday, 9 February 2015


Lavinia Stamps Challenge #2


This is the first time I have entered the Lavinia Stamps Challenge so here goes...

Wednesday, 21 January 2015

Anything Goes Lavinia Stamp Challenge


Relaxing with Lavinia Stamps 


Products used in the making of this card were : 

Gesso
Cosmic Shimmer Vintage ink spray
H20's
White paint fine line marker
Archival Black ink pad for stamping
8 x 8 white card
Black Mirri Board


Thanks for looking 

Love Doreen 


Tuesday, 30 December 2014

Clarity Challenge #22 Trees

Clarity Challenge #22 

Trees


This card was made with the use of Clarity Stamp ATC stamps.stencil and stencil brushes.
Additional products include Distress inks and a Sakura micron pen 005.

Thanks for looking 

love 
Doreen